Template Editor Introduction
The template editor is the main tool in Templify and is where you will be spending most of the time. It is designed with the goal of making
text template work and management both efficient and simple. In this section we will go through the general flow, and go through its feature set and functionalities.
The general flow is as follows:
- Add category (if non already exist).
- Add a single template card or template collection card.
- Open the card in edit more by clicking the edit button on the bottom right side of that card.
Single template cards
- Add your text template and with your custom placeholders (by adding ## or %%).
- Save your changes by pressing the save button and exit edit mode.
- Start using the template by filling in text in the created input fields
- Copy the complete text by pressing the copy-button
Template collection cards
- Press the plus button to add collection text items.
- Add your template text (no placeholders applicable here) to each collection item.
- This card auto-saves your changes, so you can exit editing mode.
- Press each collection item text to copy its text content.
- You can re-order the collection items by pressing the order button.
Template Editor interface
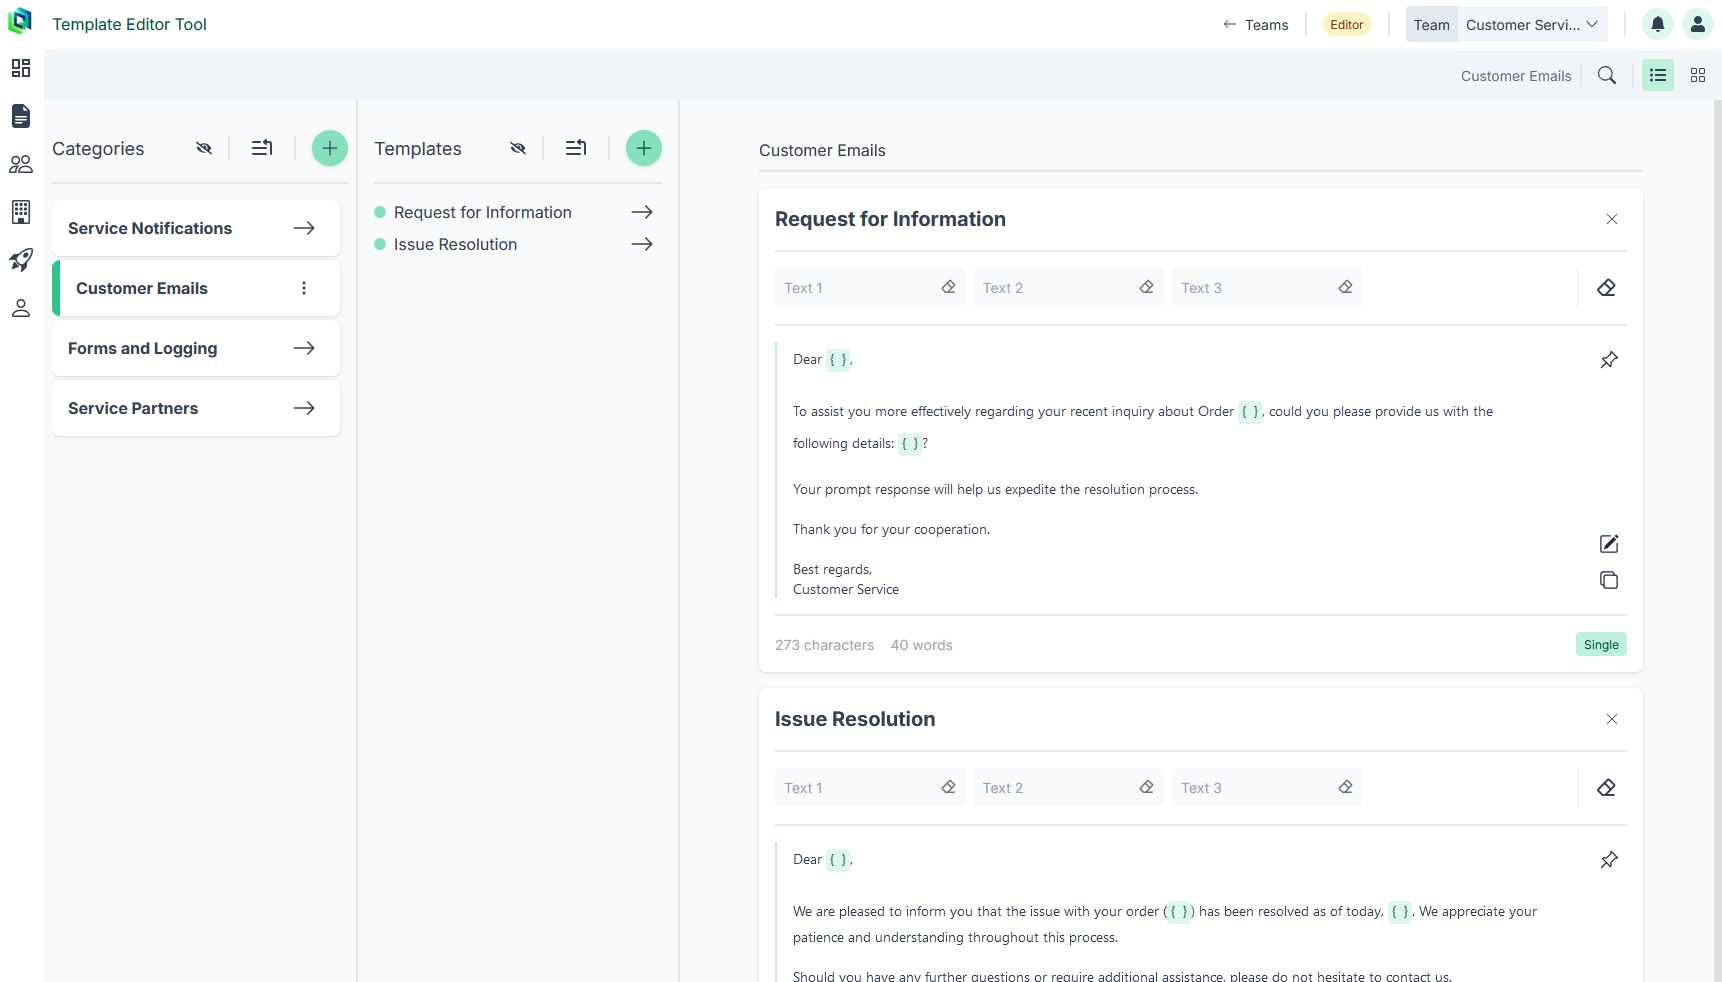
Here you have an image of the user interface with example information for a typical customer service workspace.
Below we will further explore the template editor and its features and functionalities.
Using the workspace selector dropdown
You notice that there is a dropdown appearing in the top toolbar. This dropdown is a workspace selector which gives you quick access to every workspace you have access to. This means you rarely need to ever exit the template editor as a normal user.

User role label
The label next to the workspace selector will say either editor or viewer, which indicates your permission level in the selected workspace.
An editor can, as the name implies, edit the content of the selected workspace. This includes adding and removing content like categories and template cards, and editing the contents of the cards.
A viewer can only view and use the template cards. If you need to change your role or the role of anyone in your workspace, look to the Organizations and workspaces page to see how this is done.
Template types
The two main editor cards you should know of are single template cards and template collection cards. These two elements are similar,
but provide different functionality and serve different purposes.
- Single template cards
- With single templates you can add inline placeholders and are ideal for situations like email and sms templates, where information
like names and case number/order number varies, but the rest of the text remains the same.
- has text input fields dynamically created
- use the tab key to rapidly go through the text input boxes to fill in the variable text and complete the text template.
- has clear buttons to clear the contents of each text box and a clear all button to clear the content of each input box.
- Template collection cards
- Template collections are meant for smaller amount of text and is ideal for fast paced work situations like customer service chat, where you have basic sentences which are repeated for each customer.
Template collections are different to single templates as they don't have the placeholders.
In the image below, you can see the template collection card.
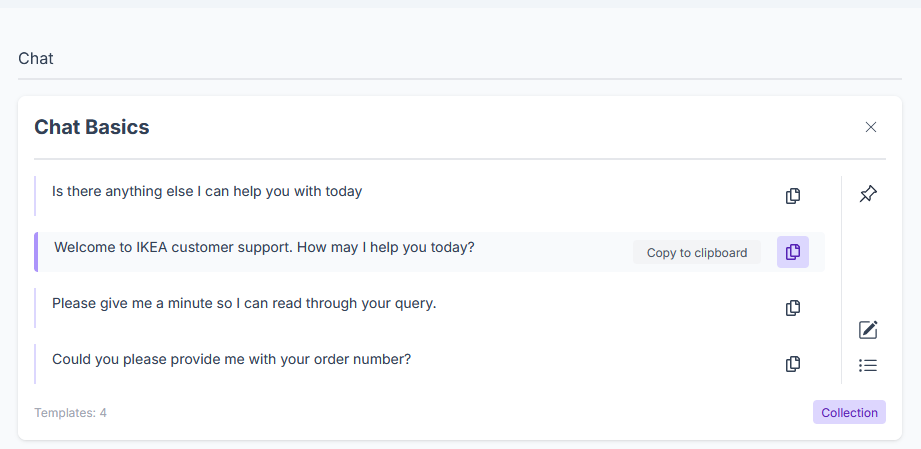
The template collection card is fairly straight forward to use, so further we will focus on the single template card, as its feature set is more extensive than the template collection card.
Using the single template cards
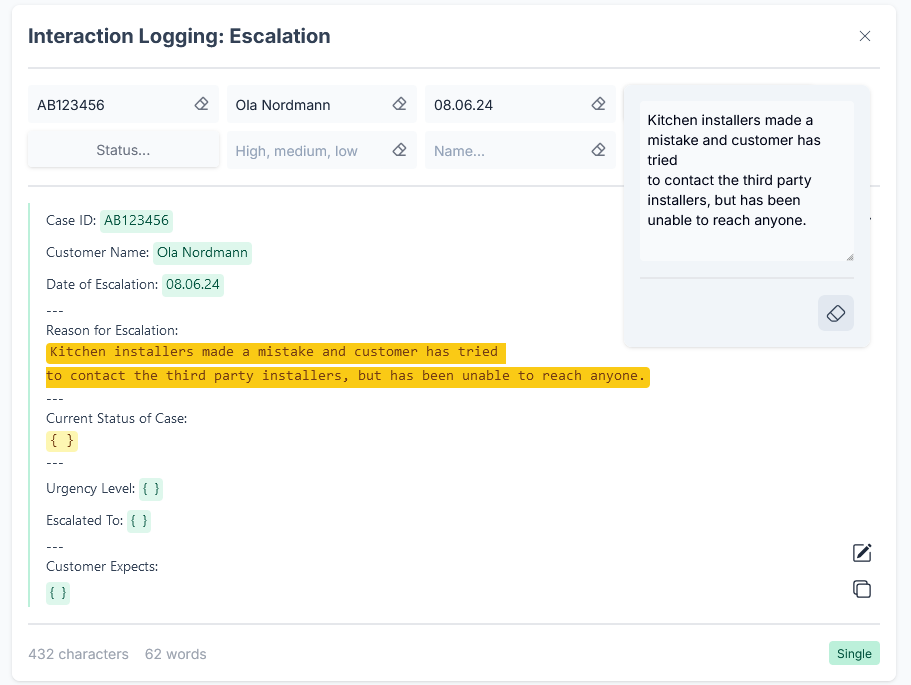
Using the single template cards you create is easy. Once you have added you text template, which you will see how is done further down, you will get a card similar to the one in the image below.
The created input boxes are fast and simple to step through using the tab key and once you've filled in the text boxes, just hit the copy button, and you will get the complete text copied to your clipboard.
This means that you can create flexible and standardized templates for yourself or your organization.
Editing the Single Template card content
After adding a card, you would most likely need to add or modify the content. In order to do so, just click the edit button on the card and you will enter
the edit mode.
Now you can add or modify text, just remember to click the save button for you changes to take effect.
Adding text placeholders and text boxes
There are at the time of writing this two placeholder types, which is the single line placeholder and multi-line placeholder.
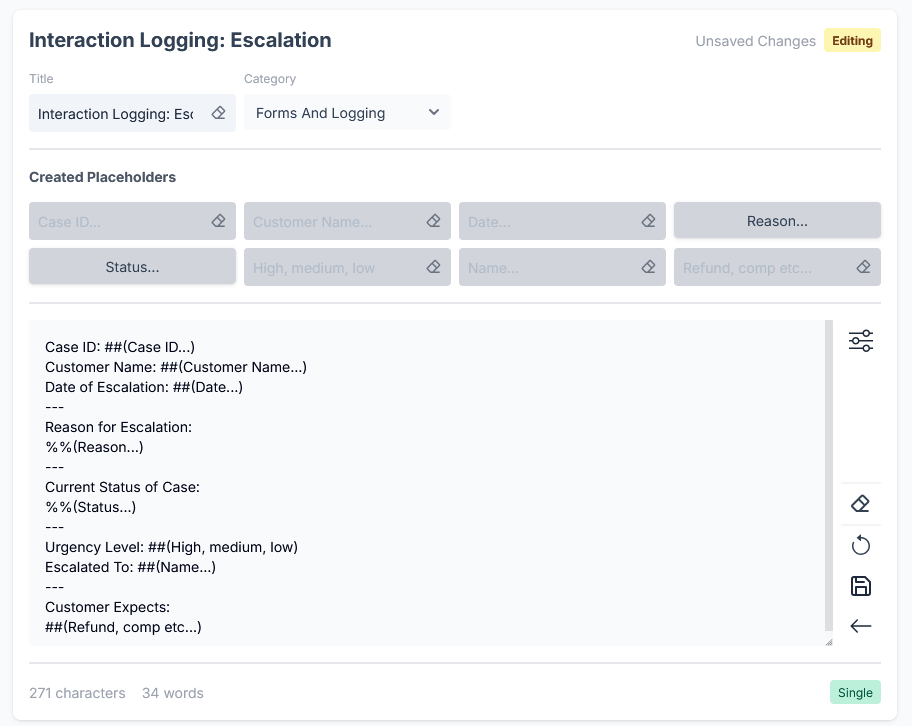
The key for adding a single-line placeholder and text box is ##.
If you try adding ## when adding your text template in edit mode, you'll notice an text input box appear and will appear for each instance of ## in your text template.
The key for adding a multi-line placeholder and textarea box is %%.
Changing the default text in the created text boxes
By default the system will add "Text 1", "Text 2" "Text 3" and so on for each created text box.
You can set your own, more descriptive text to these text boxes. The text will appear when there is no text written in the text boxes, and it might be a good idea to add something descriptive.
The syntax for adding custom input text box placeholder text is ##(Your text goes here).
The same applies for multi-line textareas, %%(Reason for customer escalation). "Reason for customer escalation" is here the descriptive text, which gives the
one using the template a better understanding of what the content inside could be.
Adding text blocks in the text template (especially useful for IT professionals)
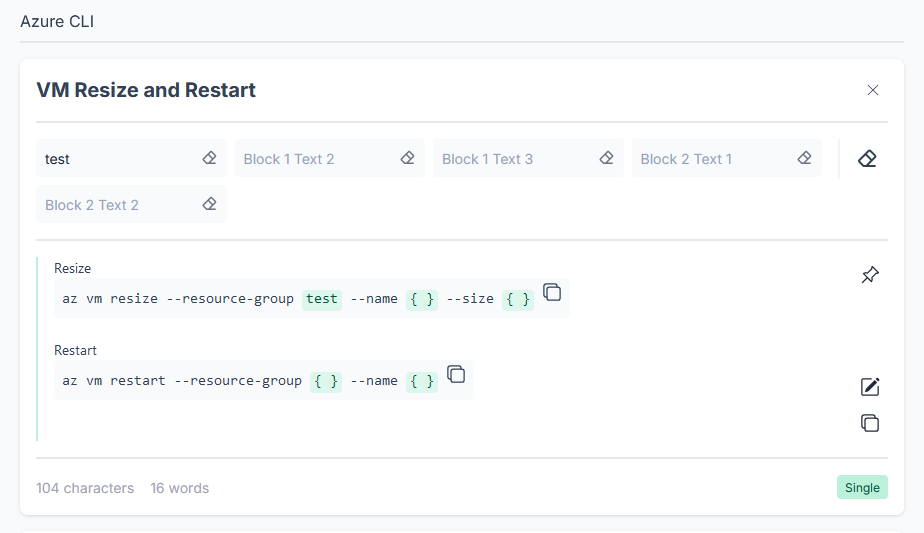
You can add text blocks, or code blocks by wrapping a line of text in backticks and when you save, you'll see that a code block has been rendered.
What is very useful here is that you can still have placeholders inside your code blocks, so if you work as an sys admin, or an environment dealing a lot
with command-line interfaces, you can store your one-liners in these code blocks and add the placeholders for variable text.
What is very useful here is that you can have a card for a specific task or work flow, and have all the commands for that work flow within that card, which not only makes your life easier when performing your tasks, but this also serves as very clear documentation of your workflow.
A quick overview - Organizations and workspaces
Organizations - Features and purpose
- a subscription is tied to an organization.
- you invite members to your organization (to be able to share and work on the same templates)
- user roles: organization owner, organization admin.
- you can delegate the admin role to anyone, if need be.
- one organization can have many workspaces.
workspaces - Features and purpose
- template cards and categories are tied to a specific workspace.
- the organization owner or organization admin can create and delete workspaces, and change the workspace names.
- the organization owner or organization admin can add members in their organization to the workspaces they have created
- the organization owner or organization admin can edit the role of each workspace member.
- the workspace roles are editor and viewer
- the editor role permits to make changes within the template editor
- the viewer role restricts editorial actions
- an organization member can be added to multiple workspaces created by the organization.
Organization
In order to use The Templify app, you would need to create an organization. The word "organization" doesn't mean a company, but is just a word for a larger structural unit dealing
with billing and members. Templify didn't used to have workspaces and organizations, but in order to make templates shareable between users, adding organizations and workspaces seemed like a logical solution.
Billing and subscriptions
For now, we're not charging for access or usage of Templify, but if (or when) the time comes, billing and subscriptions will be tied to organizations and not directly to a specific user.


